

Glycol chillers are essential equipment in various industries, especially in breweries, food processing plants, and medical facilities. As a professional glycol chiller supplier, we understand the importance of proper settings for these machines to ensure efficient performance and long - term durability. In this blog, we'll guide you through the process of adjusting the settings of a glycol chiller to help you make the most out of your equipment.

Understanding the Basics of a Glycol Chiller
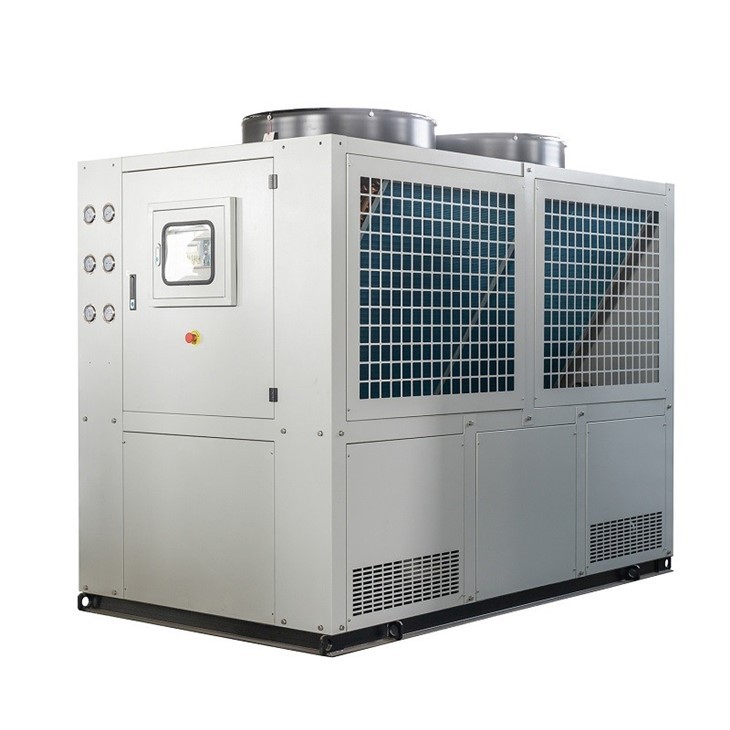
Before we delve into the settings, it's crucial to understand what a glycol chiller is and how it works. A glycol chiller is a refrigeration system that uses a mixture of water and glycol as a coolant. The glycol enhances the heat - transfer properties of the water and also prevents freezing at low temperatures.
The main components of a typical glycol chiller include a compressor, condenser, evaporator, and expansion valve. The compressor compresses the refrigerant gas, increasing its temperature and pressure. The hot refrigerant then flows to the condenser, where it releases heat to the surroundings. Next, the refrigerant passes through the expansion valve, which reduces its pressure and temperature. Finally, the cold refrigerant enters the evaporator, where it absorbs heat from the glycol - water mixture, cooling it down.
Step - by - Step Guide to Adjusting Glycol Chiller Settings
1. Temperature Settings
The first and most critical setting on a glycol chiller is the temperature. The ideal temperature depends on the specific application. In a brewery, for example, the glycol temperature might need to be maintained between 1 - 5°C (33.8 - 41°F) to ensure proper fermentation.
- Accessing the Temperature Control Panel: Most modern glycol chillers come with a digital control panel. Locate the panel on the chiller unit. It usually has a display and a series of buttons for adjusting the settings.
- Setting the Target Temperature: Use the arrow keys or a numeric keypad on the control panel to set the desired temperature. Make sure to double - check your input and confirm the setting. Some chillers also allow you to set a temperature range, which gives the system a bit of flexibility and can prevent frequent cycling.
- Temperature Calibration: Over time, the temperature sensor in the chiller might drift. It's a good practice to calibrate the temperature setting regularly. You can use a reliable external thermometer to measure the actual temperature of the glycol solution and compare it with the reading on the control panel. If there's a significant difference, follow the manufacturer's instructions to calibrate the sensor.
2. Pressure Settings
Proper pressure is vital for the efficient operation of the chiller. Both the high - side and low - side pressures need to be within the recommended range.
- High - Side Pressure: The high - side pressure is the pressure on the discharge side of the compressor. If the high - side pressure is too high, it can cause the compressor to overheat and may lead to premature failure. Check the pressure gauge on the condenser or high - pressure line. The allowable high - side pressure range is typically specified in the chiller's manual. If the pressure is out of range, it could be due to issues such as dirty condenser coils, a blocked refrigerant line, or an overcharged refrigerant system. You might need to clean the condenser coils or consult a professional technician for further diagnosis.
- Low - Side Pressure: The low - side pressure is measured on the suction side of the compressor. An abnormally low low - side pressure can indicate a refrigerant leak, a blocked expansion valve, or a problem with the evaporator. Again, refer to the chiller's manual for the correct low - side pressure range.
3. Flow Rate Settings
The flow rate of the glycol - water mixture is another important factor. It determines how effectively the chiller can transfer heat.
- Installing a Flow Meter: To accurately measure the flow rate, consider installing a flow meter in the glycol piping system. This will give you a precise reading of the volume of the fluid passing through the system per unit of time.
- Adjusting the Pump Speed: Most glycol chillers are equipped with a pump to circulate the glycol - water solution. You can adjust the pump speed to control the flow rate. Refer to the pump's control panel or the chiller's overall control system to make these adjustments. Increasing the pump speed will increase the flow rate, but be careful not to set it too high as it can cause excessive pressure and potentially damage the system.
Advanced Settings and Considerations
Alarm Settings
Glycol chillers are usually equipped with alarm systems to notify you of potential problems. You can adjust the alarm settings in terms of temperature, pressure, and other parameters.
- Temperature Alarms: Set the high - and low - temperature alarm thresholds according to your application's requirements. For example, if the temperature in a brewery glycol chiller goes above 7°C (44.6°F), it might affect the fermentation process. So, you can set the high - temperature alarm at this value.
- Pressure Alarms: Similarly, set the high - and low - pressure alarm levels based on the recommended ranges in the chiller's manual. When an alarm is triggered, it's important to respond promptly to prevent further damage to the system.
Energy - Saving Settings
To reduce energy consumption, many glycol chillers offer energy - saving features.
- Variable - Speed Compressor: Some chillers are equipped with a variable - speed compressor. You can set the compressor to operate at different speeds depending on the load. During periods of low demand, the compressor can run at a lower speed, consuming less energy.
- Economizer Mode: If your chiller has an economizer mode, enable it. This mode allows the chiller to use outside air for cooling when the outdoor temperature is low enough, reducing the workload on the refrigeration system.
Recommended Products for Different Applications
As a glycol chiller supplier, we offer a wide range of products suitable for different applications. If you are operating a 10HL brewery, our 10HP Glycol Chiller For 10HL Brewery is an excellent choice. It provides reliable and efficient cooling to ensure the quality of your beer fermentation.
For those in need of cooling beer on a larger scale, our 20KW Glycol Chiller For Cooling Beer is a powerful solution. It can handle high - volume cooling requirements with precision.
If you have a 10bbl or 20bbl beer brewing system, our Air Cooled Glycol Water Chiller For 10bbl 20bbl Beer Brewing System is designed to meet your specific needs. It offers easy installation and maintenance, making it a popular option among brewers.
Conclusion
Adjusting the settings of a glycol chiller is a crucial task that requires a good understanding of the equipment and its operation. By following the steps outlined in this blog, you can optimize the performance of your glycol chiller, improve energy efficiency, and extend its lifespan. If you have any questions or need further assistance with setting up or adjusting your glycol chiller, please don't hesitate to contact us. We are here to help you find the best solutions for your cooling needs and are ready to discuss your procurement requirements.
References
- Manufacturer's manuals of various glycol chillers.
- Industry standards for refrigeration and cooling systems in breweries and food processing.


